Follow these instructions to add a Hebcal Jewish holiday calendar 5-year feed to Outlook.com (also called outlook.live.com Calendar). This technique will also work with Windows 10 devices (desktops, laptops, tablets and phones) that have a built-in calendar application that connects to Outlook.com or MSN.
- Go to https://www.hebcal.com/hebcal if you’re downloading a holiday calendar, or https://www.hebcal.com/yahrzeit if you’re downloading a Yahrzeit + Anniversary calendar.
- Fill out the form with your preferences and click the Create Calendar button
- Click the Download… button
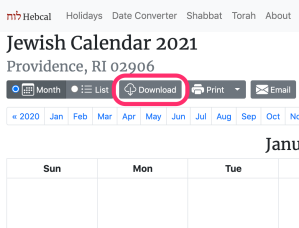
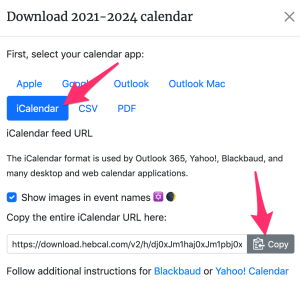
- Select the iCalendar option from the Download dialog box, and then click on the Copy button
- Sign in to Outlook.com
- At the bottom of the page, select

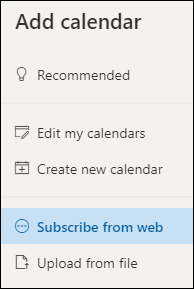
- In the navigation pane, select Add calendar
- Select Subscribe from web.
- Enter the URL for the calendar
- Select Import
Included in the Hebcal Jewish holiday downloads are options to select major holidays (Rosh Hashana, Yom Kippur, Pesach, etc.), minor holidays (Purim, Chanukah, etc.), special Shabbatot, public fasts (Tish’a B’Av, etc.), Rosh Chodesh, and modern holidays (Yom HaAtzma’ut, etc.).

![[Regional Options Dialog Box]](https://www.hebcal.com/i/regional-options-date.gif)