
Changing timezone causes Outlook all-day events to shift

We occasionally receive reports from Outlook on Windows users experiencing a problem with Hebcal calendar events spanning two days. For example, rather than a holiday appearing as an “all-day” event with no particular time, each event appears to be a 24-hour long event that starts at 11pm (23:00) on one day, and end at 11pm on the other day.

The root cause of the problem seems to be when the computer changes time zones. For example, the Hebcal calendar feed was generated for Tel Aviv, but then the computer or Outlook timezone was changed to London, England.

We have been able to reproduce this issue on Windows 11, and the fix involves 3 steps:

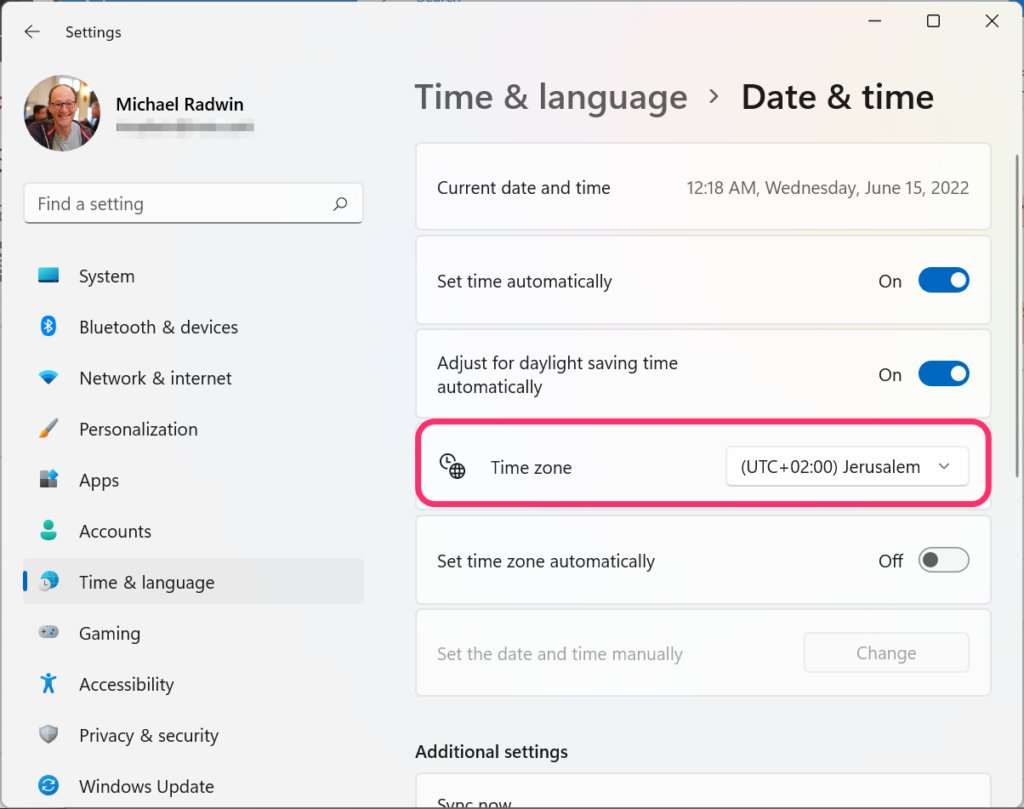
  1. Adjusting the computer’s timezone to match the calendar feed timezone
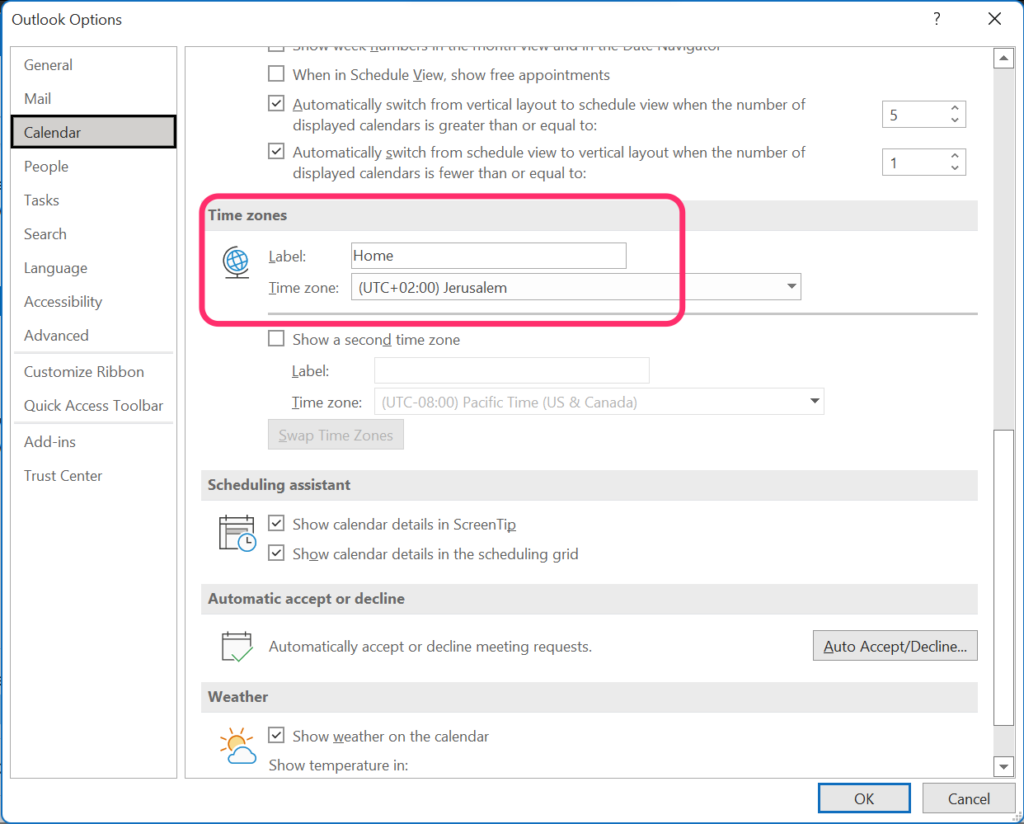
  2. Adjusting Outlook’s timezone to match the calendar feed timezone
  3. Restarting Microsoft Outlook

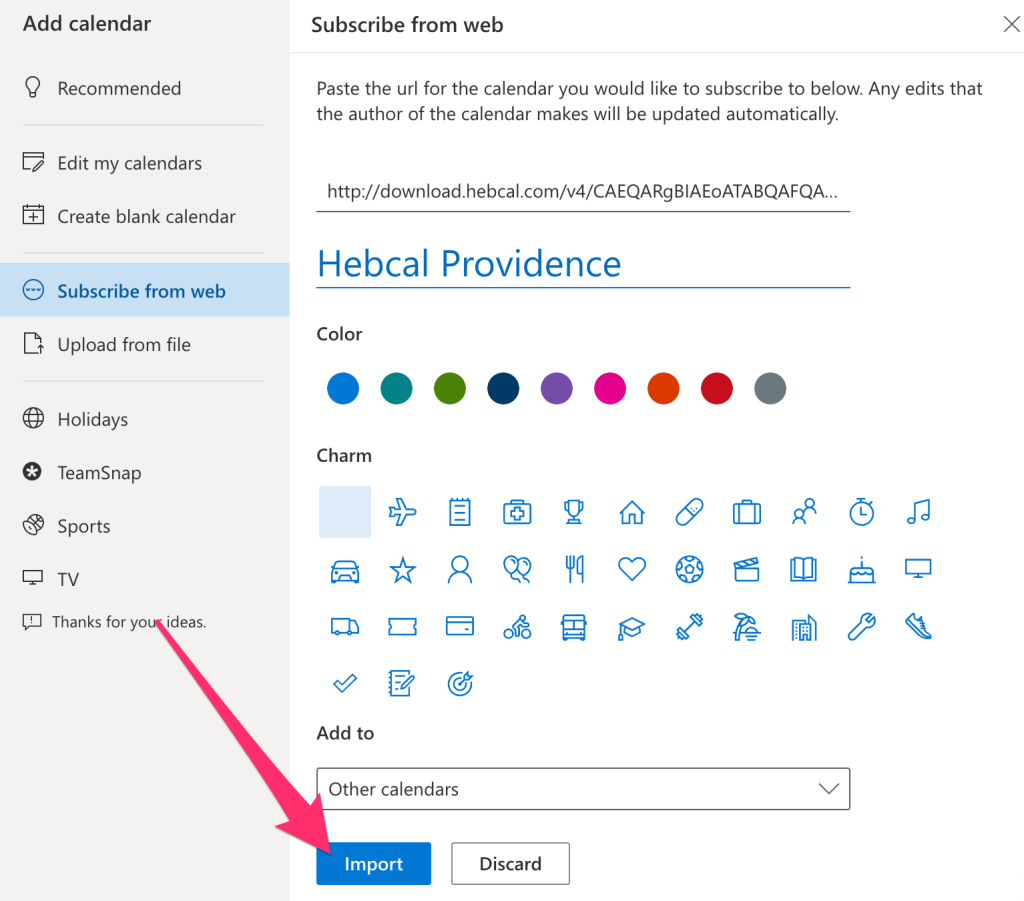
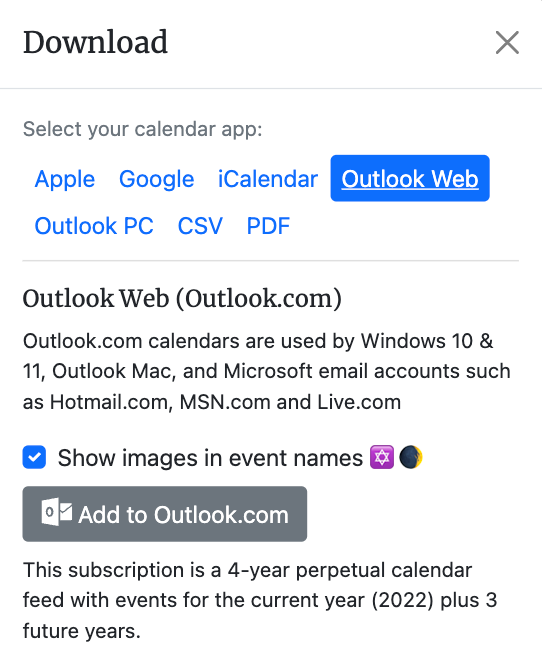
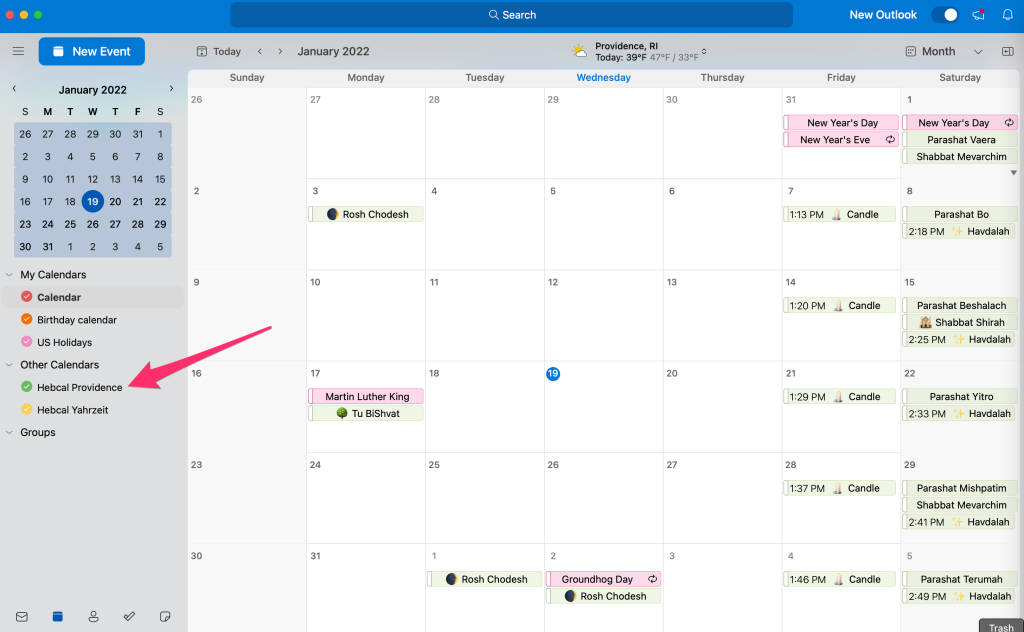
If you are experiencing this problem, here are a few examples of what settings to look for and adjust:

Outlook.com Jewish holidays download

The following instructions demonstrate how to subscribe to a Hebcal calendar on Outlook.com (sometimes called “Outlook Web”). Outlook.com calendars are used by Windows 10 & 11, Outlook Mac, and Microsoft email accounts such as Hotmail.com, MSN.com and Live.com.

1. Open a web browser on your computer.

2. Fill out the form with your preferences and click the Create Calendar button

3. Click the Download… button

4. Select the Outlook Web option from the Download dialog box. Then click the Add to Outlook.com button.

5. If prompted, login using your Microsoft username and password

6. When Outlook Web prompts you to Subscribe from web, confirm your options (such as color and charm) and then click the Import button

7. For more details, see Import or subscribe to a calendar in Outlook.com from Microsoft’s support site.

Google Calendar – delete Hebcal

If you subscribed to a Hebcal calendar using our recommended Google Calendar Jewish holidays subscription option, follow our Google Calendar unsubscribe instructions to remove it from your Google Calendar list.

If you manually downloaded Hebcal events using our Google Calendar alternative instructions and imported them into separate calendar (listed under “My calendars”), follow these instructions:

  1. On your computer, open Google Calendar.
  2. In the top right, click Settings  >  Settings.
  3. In the left column, find the calendar you want to delete.
  4. Click the name of the calendar.
  5. Click Remove calendar >  Delete > Delete permanently.

If you manually downloaded Hebcal events and merged them with (embedded them into) your personal calendar, the process is more difficult. Unfortunately, Google does not provide a simple way to bulk delete multiple calendar events. Although there really isn’t another option than to delete each event individually, you can change your view to Schedule view to see more events at once. From here you can delete each event individually and even make use of the search feature to find the events that you’re looking for.

  1. While in Google Calendar, click on the date range dropdown at the top right and change the view to Schedule view.
  2. Click on the magnifying glass icon at the top and search for the events that you’d like to delete. For example, try searching for “hebcal”
  3. Click on an event and then on the trash can symbol in the popup to delete it.

For other recommendations on how to remove multiple events from Google Calendar, see this excellent article: Google Calendar – Delete Multiple Events At Once (2022).

How to fix iPhone “Cannot Verify Server Identity” error

If you haven’t signed into a public WiFi or you don’t have access to the Internet, your iPhone may display an error message about the server identity of download.hebcal.com.

This article describes a couple of ways to fix the problem.

The exact error message looks like this:

Cannot Verify Server Identity

The identity of “download.hebcal.com” cannot be verified.

Fix 1: sign into public WiFi

If you are on a public WiFi, sign into the WiFi (see “Use captive Wi-Fi networks on your iPhone, iPad, or iPod touch“). Or, disable WiFi completely and use your mobile data. Usually this will fix the problem.

Sometimes you’ll need to do the above and also restart your phone.

Fix 2: disable SSL for download.hebcal.com calendars

Another way you can fix it is to disable SSL for the calendar. This will cause your iPhone to refresh any subscribed calendar feeds over HTTP instead of HTTPS.

To disable SSL for a Hebcal calendar that, go to Settings > Calendar > Accounts > Subscribed Calendars > Hebcal and the set “Use SSL” to Off.

Here’s an example screenshot showing the recommended settings:

Outlook for Microsoft 365 for Mac Jewish holidays download

This page includes instructions on how to subscribe to a Hebcal Jewish holiday calendar 5-year feed in Outlook for Microsoft 365 for Mac, Outlook 2021 for Mac, Outlook 2019 for Mac, and Outlook 2016 for Mac.

Microsoft now recommends that you sync your account to the Microsoft Cloud. “Available for Google, Yahoo, iCloud, and IMAP accounts in Outlook for Mac, this allows you to enjoy many of the best features of Mail and Calendar and Outlook for Mac.”

The following instructions demonstrate how to subscribe to a Hebcal calendar on Outlook.com, and then synchronize those calendars to Outlook for Mac on your desktop.

1. Open a web browser on your macOS computer.

2. Fill out the form with your preferences and click the Create Calendar button

3. Click the Download… button

4. Select the Outlook Web option from the Download dialog box

5. Click the Add to Outlook.com button. This button will take you directly to Microsoft’s Outlook Web calendar import page

6. If prompted, login using your Microsoft username and password

7. When Outlook Web prompts you to Subscribe from web, confirm your options (such as color and charm) and then click the Import button

8. Return to Outlook for Mac on your macOS computer. Go to the Calendar view, then select Tools > Sync

9. Check the box next to the Hebcal calendar in the Other Calendars section on the left side of the page and your events will display