
How to fix iPhone “Cannot Verify Server Identity” error

If you haven’t signed into a public WiFi or you don’t have access to the Internet, your iPhone may display an error message about the server identity of download.hebcal.com.

This article describes a couple of ways to fix the problem.

The exact error message looks like this:

Cannot Verify Server Identity

The identity of “download.hebcal.com” cannot be verified.

Fix 1: sign into public WiFi

If you are on a public WiFi, sign into the WiFi (see “Use captive Wi-Fi networks on your iPhone, iPad, or iPod touch“). Or, disable WiFi completely and use your mobile data. Usually this will fix the problem.

Sometimes you’ll need to do the above and also restart your phone.

Fix 2: disable SSL for download.hebcal.com calendars

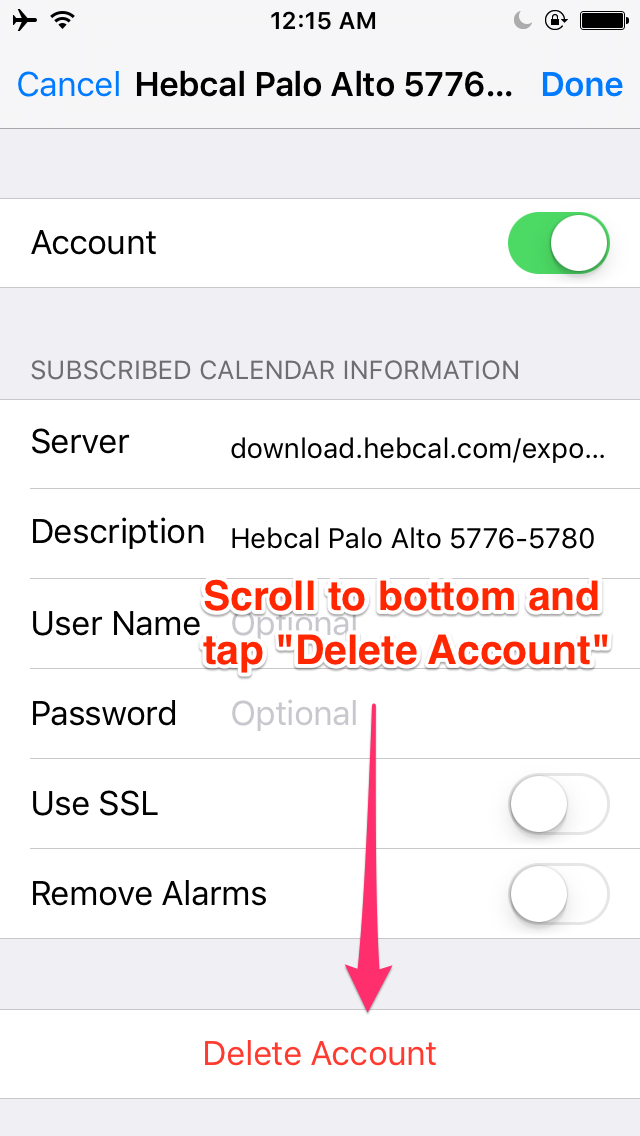
Another way you can fix it is to disable SSL for the calendar. This will cause your iPhone to refresh any subscribed calendar feeds over HTTP instead of HTTPS.

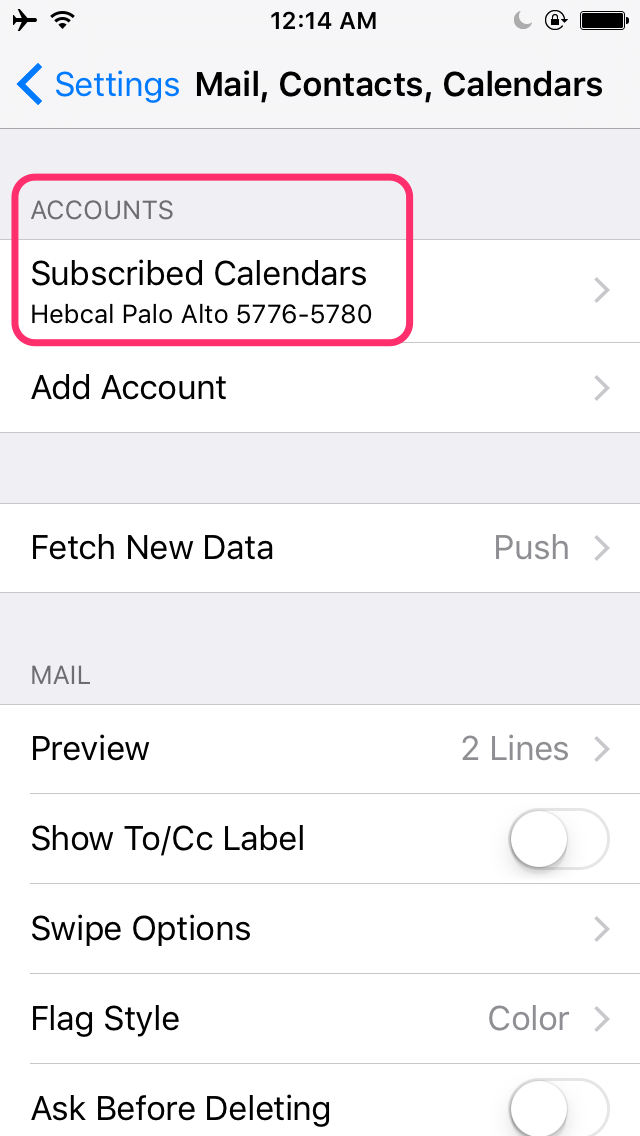
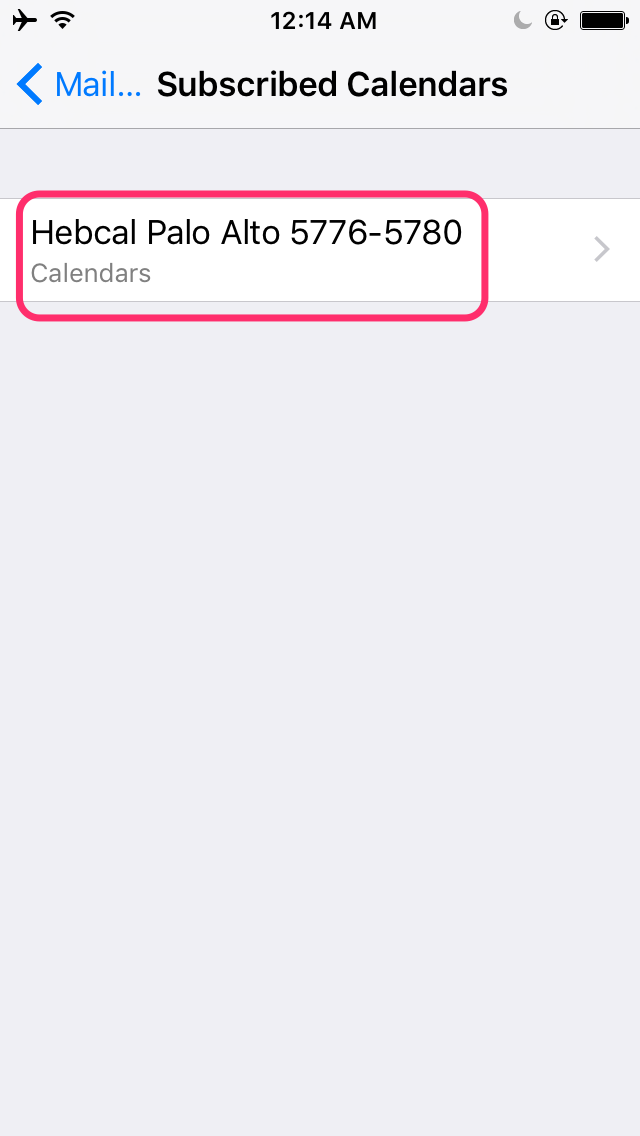
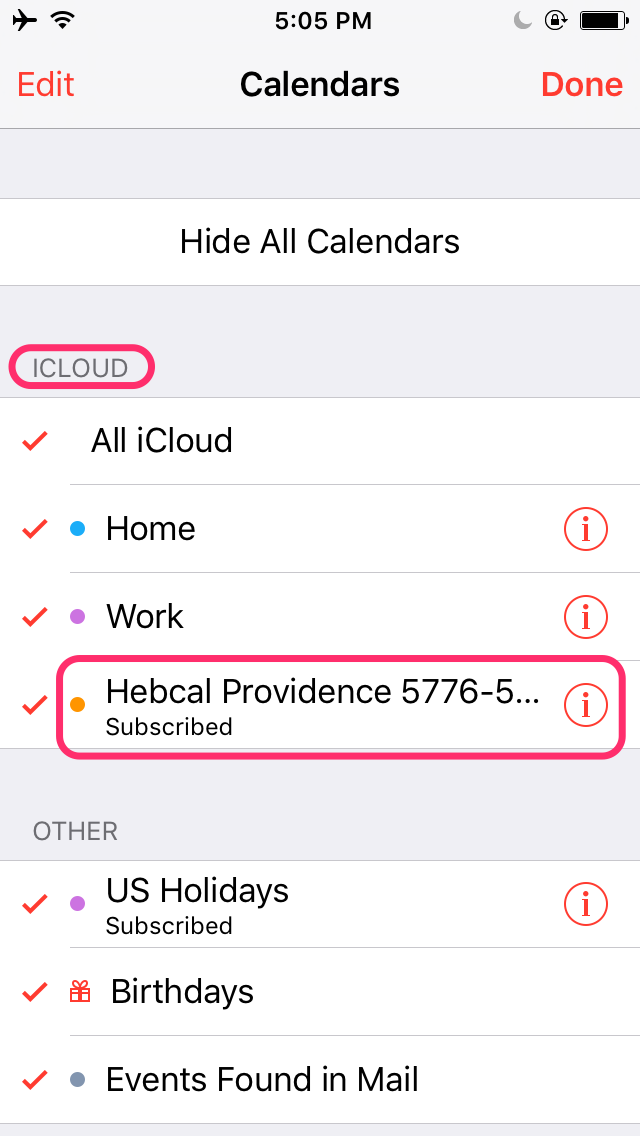
To disable SSL for a Hebcal calendar that, go to Settings > Calendar > Accounts > Subscribed Calendars > Hebcal and the set “Use SSL” to Off.

Here’s an example screenshot showing the recommended settings:

iPhone and iPad – remove Hebcal Jewish calendar (without iCloud)

To remove a Hebcal calendar from your iPhone or iPad that was subscribed directly from the iOS device, follow these steps:

  1. Go to the Settings app, then touch Mail, Contacts, Calendars.
  2. Tap Subscribed Calendars:
    hebcal-iphone-calendars-subscribed-2
  3. Tap the Hebcal calendar that you wish to remove from the list of subscribed calendars:
    hebcal-iphone-calendars-subscribed-3
  4. Scroll to the bottom of the page, and tap Delete Account
    hebcal-iphone-calendars-subscribed-4
  5. Tap Delete Account again to confirm.

See also: iCloud – remove Hebcal Jewish calendar

iCloud – remove Hebcal Jewish calendar

To remove an iCloud-managed Hebcal calendar from your iPhone or iPad, follow these three steps.

  1. Go to your Calendar app and tap Calendars at the bottom of the screen:hebcal-iphone-calendars-subscribed-0
  2. If you subscribed via iCloud, you will you see it in the iCloud section like this:
    hebcal-iphone-calendars-icloud-2
  3. Tap the circled small ⓘ info icon next to the Hebcal calendar name
  4. Scroll down and tap Delete Calendar
    hebcal-iphone-calendars-icloud-3
  5. Tap Delete Calendar again when prompted “Are you sure you want to delete this calendar? All events associated with the calendar will also be deleted.”

See also: iPhone and iPad – remove Hebcal Jewish calendar (without iCloud)

iPhone, iPad, iOS – remove Hebcal Jewish calendar

To remove a Hebcal calendar from your iPhone or iPad, you’ll need to first determine if you subscribed via iCloud or whether you subscribed directly from your iOS device.

Here are specific instructions for each option.

To determine which option applies to you, first go to your Calendar app and tap Calendars at the bottom of the screen:hebcal-iphone-calendars-subscribed-0

Subscribed via iCloud

If you subscribed via iCloud, you will you see it in the iCloud section like this:

hebcal-iphone-calendars-icloud-2

Read iCloud – remove Hebcal Jewish calendar for further instructions.

Subscribed directly on iPhone or iPad

If you subscribed directly on your iOS device, you will see Hebcal in the Subscribed section like this:
hebcal-iphone-calendars-subscribed-1

Read iPhone and iPad – remove Hebcal Jewish calendar (without iCloud) for further instructions.

iPhone & iPad Jewish holidays download

Follow these instructions to subscribe to a Hebcal Jewish Calendar multi-year feed directly from your iPhone or iPad:

1. Open Safari on your iOS device

2. Fill out the form with your preferences and click the Create Calendar button

3. Click the Download… button

Step 3: Click the Download button

4. Select the Apple option from the Download dialog box

Step 5: Click on the Subscribe on iPhone, iPad & macOS download button

5. Click on the Subscribe on iPhone, iPad & macOS download button

Step 6: Click the Subscribe button on the “Add Subscription Calendar” dialog box

6. Click the Subscribe button on the “Add Subscription Calendar” dialog box

Step 7: Review the information and then click “Add”

7. Review the information and, click Add

8. When iPhone has finished subscribing, click Done

If you later wish to remove it from your phone, go to over to Settings > Mail, Contacts, Calendar. You will see all your subscriptions listed under Accounts. Choose the one you want to edit or remove, and hit Delete Account

If you want to remove the calendar, follow these delete or unsubscribe from your iPhone or iPad instructions.